

Here's your optimized, publication-ready blog post, transformed from your original Markdown content:
Are you tired of manually wrestling with lead data, painstakingly transferring information from your WordPress website into Salesforce? Does your team spend precious hours copying form submissions, often leading to typos, missed details, and ultimately, lost opportunities?
Imagine the frustration: you’re a growing business, generating valuable leads through your WordPress forms, yet each conversion feels like a battle against manual data entry. This archaic process not only devours time but also introduces errors, slowing down your sales cycle and compromising your conversion rates.
The good news? There’s a smarter, more efficient way to connect your WordPress forms directly to Salesforce. After extensive research and testing of countless methods, we’ve pinpointed the most reliable, seamless solutions to help you automate your lead management, eliminate errors, and ensure you never miss a single prospect again! 🚀

Salesforce stands tall as one of the best CRM (customer relationship management) solutions on the market. Used by enterprises and growing businesses worldwide, it offers an unrivaled platform for managing customers, leads, and crucial business contacts from a single, centralized dashboard.
The power of Salesforce truly unleashes when it integrates effortlessly with your business's primary lead generation engine: your WordPress website.
Traditionally, most businesses rely on contact forms to generate leads, only to then manually input this data into their CRM. This bottleneck is a critical drain on resources. It costs valuable time that could be spent on nurturing leads, and worse, it drastically increases the risk of human error or even forgetting to follow up with a potential customer, leading to significant revenue loss.
Connecting Salesforce to your WordPress contact form demolishes this hurdle. The moment a user submits their information, their data automatically flows into your Salesforce contacts, ready for immediate action.
This automation empowers your team to swiftly follow up, nurture leads in a timely manner, and significantly boost conversions and sales directly from your WordPress website.
In this comprehensive guide, we'll walk you through the precise steps to integrate Salesforce with WordPress using powerful forms. Here's a roadmap of what you'll discover:
Let's dive in and transform your lead management!
For this powerful integration, you'll leverage WPForms, the undisputed best WordPress contact form plugin. Trusted by over 6 million website owners, WPForms simplifies the creation of any form with its intuitive drag-and-drop builder.
At ShareWordpress, we actively utilize WPForms for a multitude of purposes, from our primary contact forms to our annual reader surveys. For a deeper exploration of its robust features, we highly recommend reading our full WPForms review!

📝 Note: The Salesforce addon, which is crucial for this integration, is available with the WPForms Elite plan. While a WPForms Lite version is available for free, it does not include this specific addon.
To begin, you need to install and activate the WPForms plugin on your WordPress site. If you need assistance with this step, our comprehensive guide on how to install a WordPress plugin provides step-by-step instructions.
Once activated, navigate to the WPForms » Settings page within your WordPress dashboard. Here, you'll need to input your license key, which you can easily locate within your account on the WPForms website.
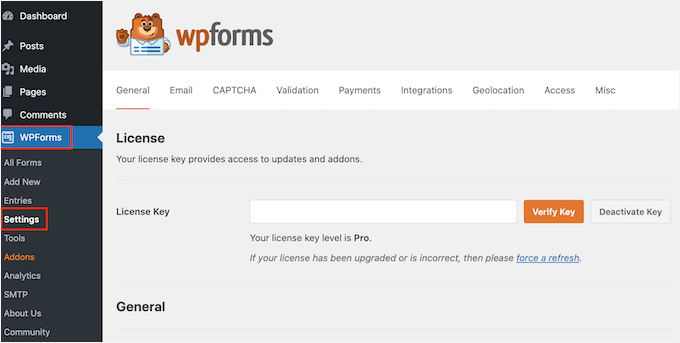
This vital step establishes the direct communication channel between your WPForms and Salesforce. WPForms simplifies this process with its dedicated Salesforce addon.
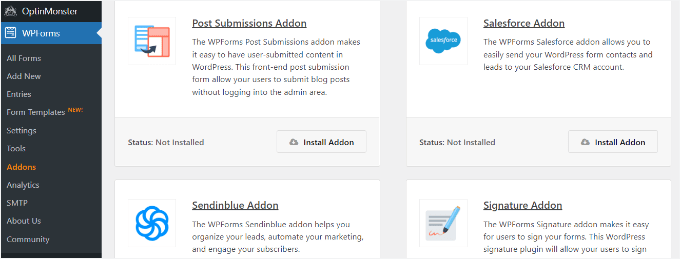
First, head to the WPForms » Addons page in your WordPress dashboard. Locate the Salesforce addon and click the ‘Install’ button. WPForms will then automatically install and activate it for you.
Next, navigate to WPForms » Settings » Integrations in your WordPress dashboard.
Click on the Salesforce integration option to expand its settings.
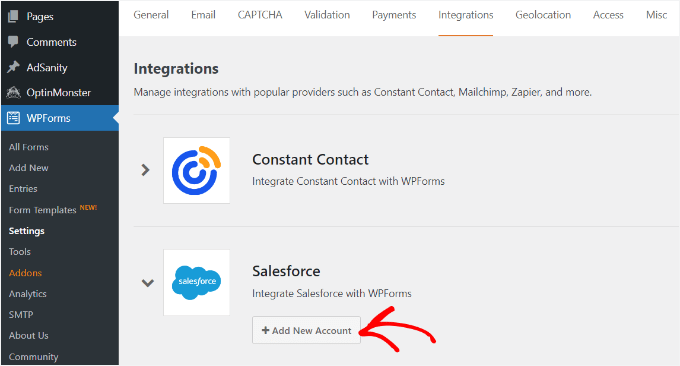
Within the Salesforce settings, click the ‘Add New Account’ button.
WPForms will then display your unique Salesforce settings, including a crucial Callback URL.

Keep this tab open in your browser, or securely copy the Callback URL. You'll need it shortly.
Now, it's time to configure an app within your Salesforce account. We'll guide you through each sub-step.
📝 Note: To utilize this integration, you need a Salesforce Enterprise, Unlimited, Performance, or Developer edition. Other editions might not support this functionality. However, Salesforce does offer a free trial, which is an excellent way to get started and test the waters.
If you don’t have a Salesforce account yet, you can sign up for one by visiting the Salesforce website and clicking ‘Start My Free Trial.’

On the subsequent screen, enter your details such as name, work email, job title, company, and phone number to create your account.
After filling out the required information, click ‘Start My Free Trial.’

Upon successful signup, you'll land on your Salesforce account dashboard.
From here, you’ll need to switch to the Salesforce Classic dashboard. Achieve this by clicking your profile icon at the top right and selecting ‘Switch to Salesforce Classic.’

You will now see the classic Salesforce interface.
Next, click the Setup link located at the top of the page to access Salesforce dashboard settings.

On the next screen, navigate to the Build » Create menu from the left-hand column.
From this menu, select the ‘Apps’ option.
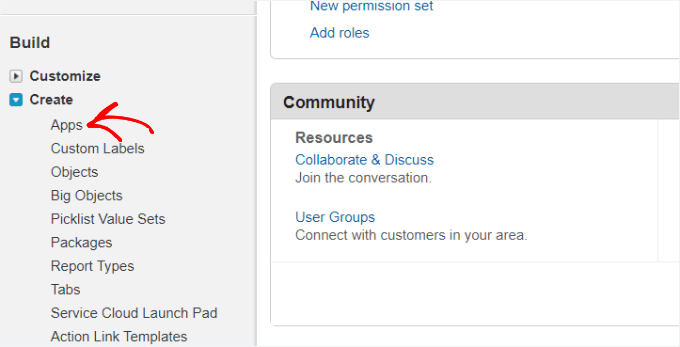
This action will bring you to the ‘Apps’ section.
Here, click the ‘New’ button located under the ‘Connected Apps’ section.

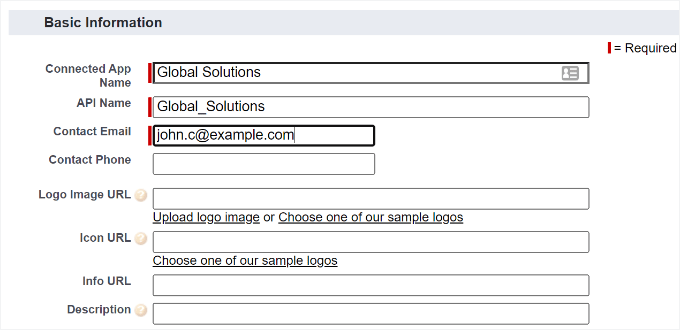
You will now be prompted to provide details for your new app.
For ‘Connected App Name,’ enter a descriptive name that helps other Salesforce users identify it.
The API name will automatically populate based on your Connected App Name – no need to modify it. For the contact email, enter your email address.
You can skip the logo image, icon, info URL, or description fields, as these are primarily for publishing apps within Salesforce.
Scroll down and check the ‘Enable OAuth Settings’ box.
Upon checking it, the OAuth settings will become visible.

First, paste the ‘Callback URL’ you previously obtained from your WPForms account into the ‘Callback URL’ field.

Next, navigate to the ‘Available OAuth Scopes’ section. These scopes define the permissions your app will have within Salesforce.
You need to enable two specific permissions: ‘Manage user data via APIS (api)’ and ‘Perform requests at any time (refresh_token, offline_access).’
Select these two permissions and click the ‘Add’ button to move them to the ‘Selected OAuth Scopes’ list.

No other changes are required on this page.
After adding the permissions, click the ‘Save’ button at the bottom of the page.
A message will appear, informing you that changes might take up to 10 minutes to reflect. Click the ‘Continue’ button.

On the subsequent screen, you’ll see your critical API information.
It’s advisable to wait the recommended 10 minutes before proceeding to ensure your app is fully configured.
Once the waiting period is over, you’ll need to copy your ‘Consumer Key’ and ‘Consumer Secret’ to paste into WPForms.
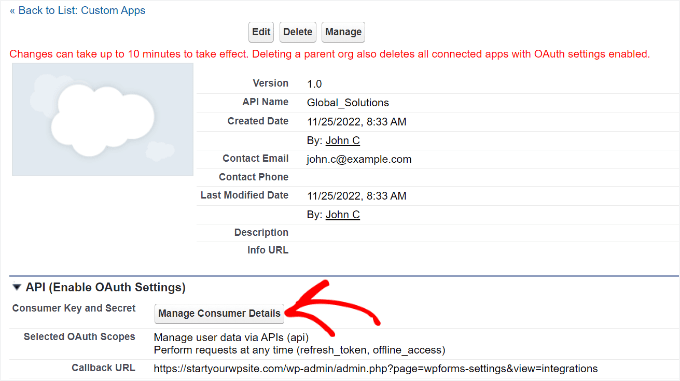
Click the ‘Manage Consumer Details’ button to proceed.
Salesforce will then prompt you for a verification code, which will be sent to your email.

Enter the code you received and click ‘Verify.’
You will then see your ‘Consumer Key’ and ‘Consumer Secret’ codes. Copy both of these values.

Now, switch back to the browser tab containing your WPForms Salesforce settings.
If you happened to close it, simply navigate to WPForms » Settings » Integrations in your WordPress admin area.
Paste the ‘Consumer Key’ and ‘Consumer Secret’ into their respective fields within WPForms.

Finally, click the ‘Connect to Salesforce’ button.
You will be redirected to Salesforce to log in. Enter your Salesforce username and password.
Next, you must click the ‘Allow’ button to grant WPForms access to your Salesforce account.

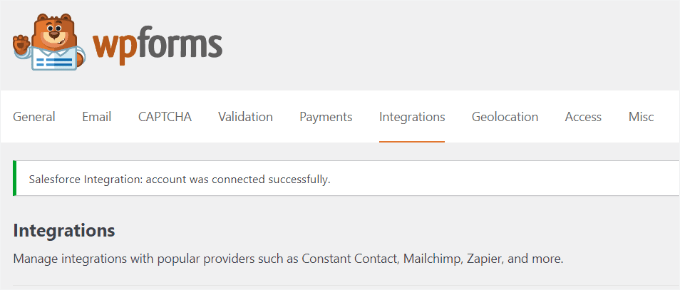
Upon successful connection, you’ll be returned to your WPForms Integrations page.
A confirmation message at the top of the screen will confirm that the connection was successful, providing peace of mind.
Congratulations! WPForms is now securely connected to your Salesforce account. You are now ready to create forms that automatically send entries directly to Salesforce, streamlining your lead capture process.
The final step is to build your WordPress form. WPForms allows you to connect any type of form directly to Salesforce, enabling versatile data capture.
Begin by navigating to the WPForms » Add New page in your WordPress admin area.
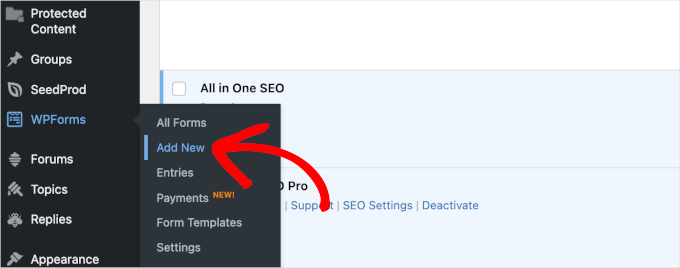
This action will launch the intuitive WPForms drag-and-drop form builder.
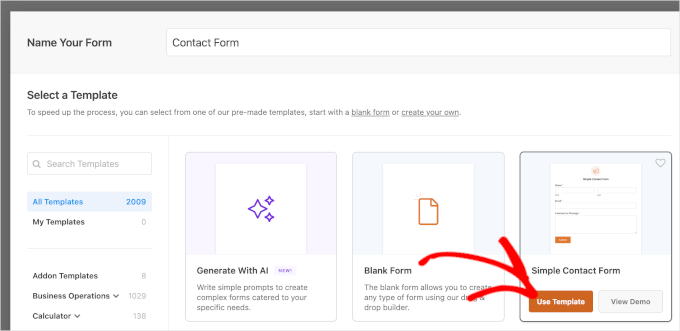
At the top, provide a name for your new form, then choose your preferred method for building it.
WPForms offers the flexibility to start from scratch with a blank canvas, but for speed and simplicity, you can leverage their AI form builder or select from a variety of pre-made templates.
If you opt for the AI builder, simply provide a brief prompt, and the tool will generate a tailored form for you. You can also explore existing example prompts if they align with your needs.

For this tutorial, we’ll use the ‘Simple Contact Form’ template.
To select it, hover over the template box and click the ‘Use Template’ button.
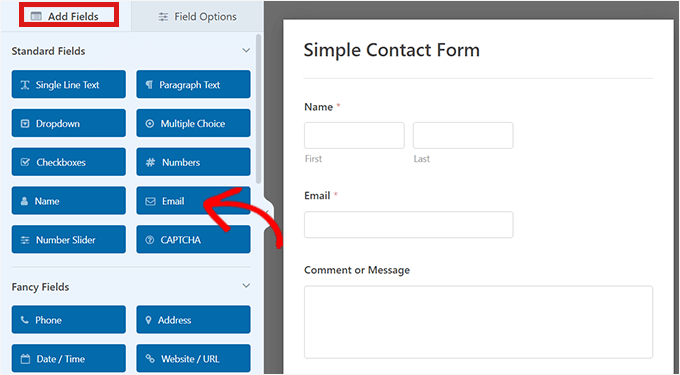
This will open the form editor, where you can easily customize your form.
Drag and drop various fields from the left-hand menu onto your template. For instance, you might add a phone number field to capture more detailed lead information.
You can also effortlessly rearrange the order of fields and further customize each individual field to perfectly suit your requirements.
For a detailed walkthrough on form customization, refer to our comprehensive guide on how to create a contact form.
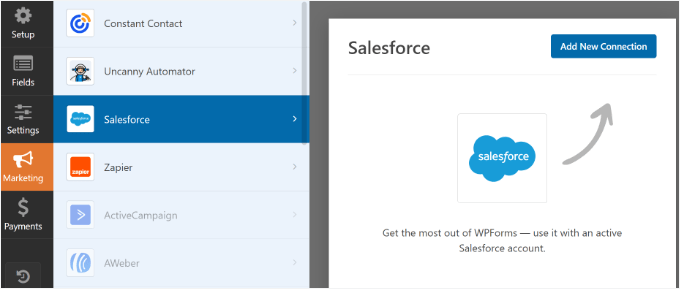
Once your form is designed to your satisfaction, navigate to the Marketing » Salesforce tab within the form builder to configure its connection to your Salesforce account.
Click the ‘Add New Connection’ button.
A popup will appear, prompting you to name your connection. This name is for your internal reference only and will not be visible to your site visitors.
Enter a descriptive name for your connection, then click the ‘OK’ button.

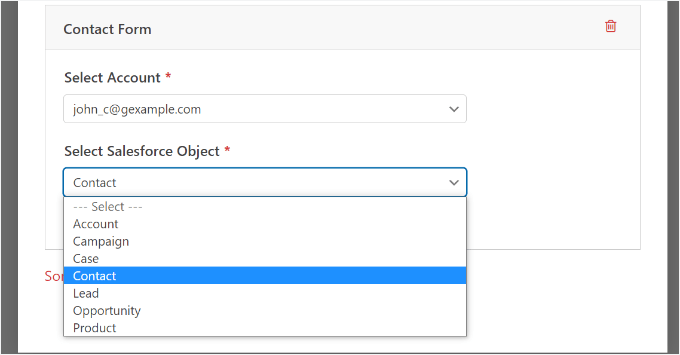
Now, you need to select your Salesforce account (if you have multiple connected) and specify the Salesforce Object.
The object defines the type of data you are sending to Salesforce, such as a ‘Contact’ (for new lead records) or a ‘Lead’ (for a more direct lead object).
Once you’ve chosen your Salesforce Object, new dropdowns will appear below.
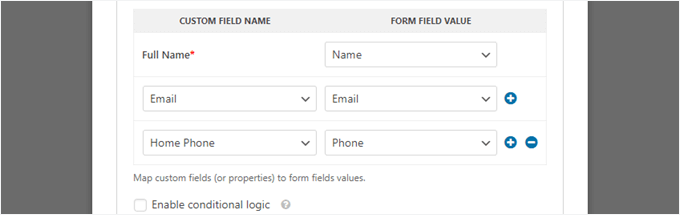
The ‘Custom Field Name’ column represents the fields within your Salesforce account, while the ‘Form Field Value’ column corresponds to the fields in your WordPress form.

You must select a ‘Form Field Value’ for each custom field you wish to populate in Salesforce. This ensures that your form data is correctly mapped and entered into the appropriate fields in your CRM.
Note that the ‘Full Name’ field is typically a required field in Salesforce. For this, select ‘Name’ as the Form Field value.
Then, select other fields from the dropdowns below, choosing the corresponding WPForms field you want to map to each Salesforce field. To add more mapping fields, simply click the blue ‘+’ button.
Here, we've included mappings for email and phone fields from our form:
Crucially, don’t forget to click the ‘Save’ button at the top right of the screen after configuring your Salesforce connection within the form.
WPForms makes it incredibly simple to embed your forms anywhere on your WordPress website.
Simply edit an existing post or page where you wish to add the form, or create a brand new one. In the content editor, click the ‘(+)’ add new block button and select the ‘WPForms’ block.
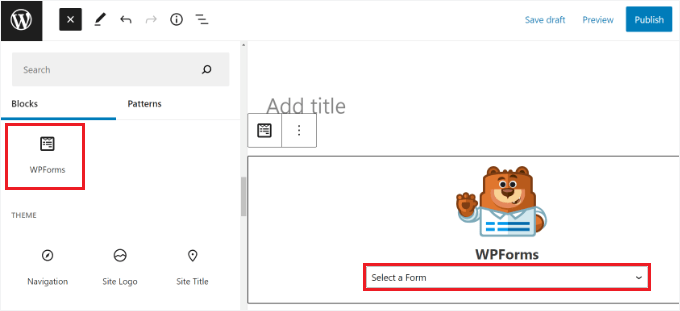
Next, from the dropdown list within the WPForms block, choose the contact form you just created.
Finally, publish your page to make your form live on your site.
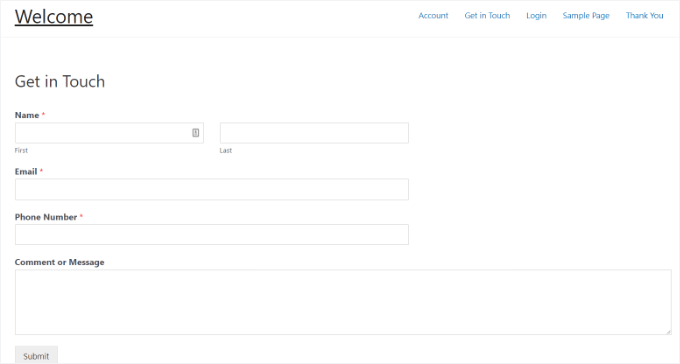
It's always best practice to test your form to confirm that the Salesforce connection is working perfectly.
Fill in some test data into the fields and click ‘Submit.’

Then, switch to your Salesforce account dashboard.
You should immediately see a new item listed on your homepage or within the relevant object (e.g., Leads or Contacts).

Click on the name of the new entry to view the complete information for that contact or lead.
You have now successfully established a powerful, automated connection between Salesforce and WPForms. All your incoming leads and contacts will now flow directly into your Salesforce account, ready for immediate follow-up and management, freeing you from manual data entry forever!
We trust this article has provided a clear and actionable path to seamlessly connect Salesforce with your WordPress forms, alleviating the burden of manual lead management.
Ready to explore even more ways to build, enhance, and optimize your WordPress forms for maximum impact? Dive into these highly beneficial tutorials and unlock further capabilities:
If you found tremendous value in this article, be sure to subscribe to our YouTube Channel for cutting-edge WordPress video tutorials. You can also connect with us and the vibrant ShareWordpress community on Twitter and Facebook. Your journey to a more efficient, automated lead management system starts now!
