

This comprehensive guide details advanced strategies for ensuring your WordPress website is perfect before it ever meets your audience.
Imagine launching a brand new website or publishing critical content, only to discover a broken layout, missing images, or cringe-worthy typos moments after it goes live. It's a frustrating, embarrassing, and all too common scenario that can erode visitor trust and brand reputation. At ShareWordpress, with thousands of WordPress pages and posts under our belt, we've learned this lesson firsthand: meticulous content previewing is not optional; it's foundational.
Skipping this vital step isn't just a minor oversight—it's a direct path to unexpected surprises for your visitors. These issues are not only easy to avoid, but proactively addressing them ensures your site looks and functions exactly as intended, delivering a seamless, confidence-inspiring experience for both you and your audience.
This ultimate guide will arm you with the essential strategies and tools to flawlessly preview every aspect of your WordPress website before pressing that "publish" button. Get ready to eliminate anxiety and embrace publishing with absolute certainty. 🧑💻

Ready to ensure your WordPress site is pixel-perfect before launch? We've meticulously organized this guide into actionable sections, providing you with practical insights and step-by-step instructions. Feel free to use the quick links below to navigate to specific topics:
Launching a new WordPress website requires a polished first impression. While you're busy crafting the perfect site, you don't want visitors stumbling upon a half-finished project. This is where a 'Coming Soon' mode becomes indispensable.
It allows you to present a professional placeholder page to your public visitors, while you, as the administrator, can continue to log in, work, and crucially, preview your website in its true, live state before the grand reveal.
The most effective way to implement a stunning and functional 'Coming Soon' page is by using SeedProd. As the industry-leading WordPress website builder, SeedProd offers unparalleled ease in creating visually appealing and conversion-focused 'Coming Soon' pages.
We've seen first-hand how SeedProd empowers our partners and countless users to launch with confidence, and we regularly leverage its capabilities in our own tutorials. For a deeper dive, explore our detailed SeedProd review.

Expert Tip: While this tutorial focuses on SeedProd's robust Pro features for advanced templates and functionalities, a free version is also available, perfect for creating straightforward 'Coming Soon' pages.
First, ensure the SeedProd plugin is installed and activated. If you need assistance, follow our step-by-step guide on how to install a WordPress plugin.
Upon activation, navigate to SeedProd » Settings to input your license key, which you can find in your SeedProd account.

Next, from your WordPress admin area, head to the SeedProd » Landing Pages screen. Here, click the ‘Set up a Coming Soon page’ button.

SeedProd provides a diverse collection of professionally designed 'Coming Soon' templates crafted to optimize conversions. Select the one that best suits your brand's aesthetic.

Once chosen, the intuitive SeedProd page builder will launch. This drag-and-drop interface allows you to effortlessly design your page: simply point, click, and customize any element, or drag new blocks from the left column into your layout.

Enhance your 'Coming Soon' page by adding email signup forms and social media buttons, allowing future visitors to connect with your brand pre-launch.
Transition to the 'Connect' tab at the top to integrate your email marketing service. This enables you to grow your subscriber list and send exciting launch announcements. For a comprehensive walkthrough, see our tutorial on how to create coming soon pages in WordPress with SeedProd.

After finalizing your design, click 'Save,' then 'Publish.' Don't worry, your page isn't live yet—it's simply ready.

Close the page builder to return to the SeedProd » Landing Pages screen. To activate your 'Coming Soon' page, toggle the switch under the 'Coming Soon Page' box to 'Active.' This ensures all public visitors see your placeholder page, not your developing website.

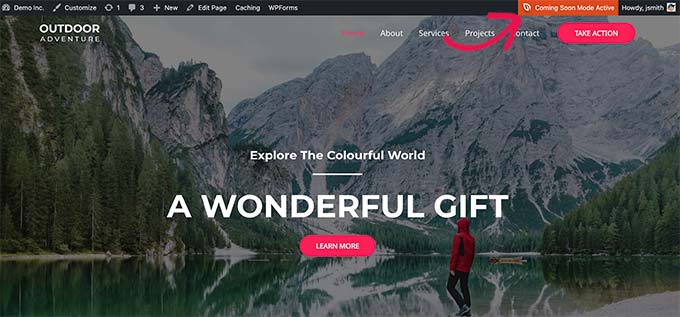
Now, log out of your WordPress admin or open your site in Incognito mode to confirm your 'Coming Soon' page is live.

While the 'Coming Soon' page is active for the public, you can still access your WordPress dashboard and continue unrestricted work on your website. Crucially, as a logged-in administrator, you can actively preview your live website and test its functionality.
When your site is complete and ready for the world, simply return to SeedProd » Landing Pages and toggle the 'Active' slider back to inactive.

Related Reading: SeedProd also offers a similar functionality to easily put your website in maintenance mode while you work. Unsure of the distinction between these two powerful modes? Dive into our detailed comparison: Coming Soon vs Maintenance Mode: What’s the Difference (Explained).
When building client websites, providing seamless and secure previews of your work-in-progress is paramount for smooth collaboration and satisfied clients. While various methods exist, leveraging a 'Coming Soon' page created with SeedProd offers the most straightforward and professional solution.
With your 'Coming Soon' mode already active (as detailed in the previous section), you can grant clients exclusive access to bypass this page and preview the full website.
First, click the ‘Edit Page’ button within your active 'Coming Soon' page settings.

This action will launch the SeedProd page builder. From here, navigate to the 'Page Settings' tab.
Then, expand the ‘Access Control’ section.

Within 'Access Control,' you can generate a unique 'Bypass URL' and even set an expiration duration for it. Remember to 'Save' your changes.
Your clients can now use this secret, shareable URL to seamlessly view your developing website, completely bypassing the 'Coming Soon' page. This ensures they see the latest changes in real-time without you needing to take the site live.
If your website is already live and you need to share specific updates with clients before making them public, the next section on staging sites provides an even more robust solution.
For web professionals and serious site owners, a staging environment is not merely a convenience; it's a fundamental best practice. A staging website is essentially a private, exact clone of your live site. It's hidden from public view, providing a secure sandbox where you can meticulously test and preview any changes—whether it's a plugin update, a theme overhaul, or new functionality—before deploying them to your production site.
This eliminates the risk of downtime, broken features, or unsightly errors impacting your live audience. Many of the top WordPress hosting companies now offer user-friendly, one-click staging site creation, allowing for effortless synchronization of changes to your live environment.
For this guide, we'll illustrate the process with Bluehost, a globally recognized and officially recommended WordPress hosting provider known for its integrated staging site feature.
To begin, ensure the Bluehost plugin is installed and activated on your website. If you see a Bluehost menu item at the top of your WordPress admin menu, you're good to go.

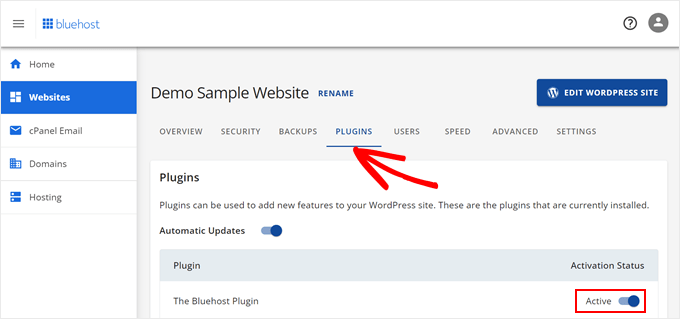
If the Bluehost menu is absent, log into your Bluehost hosting account control panel. Click ‘Websites,’ then ‘Settings’ for your specific website.

Under the site management area, switch to the ‘Plugins’ tab and activate the Bluehost plugin.
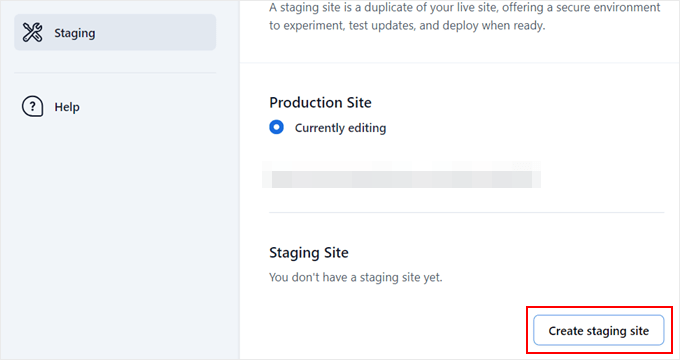
Once the Bluehost plugin is confirmed active, you're ready to create your staging site. From your WordPress admin, navigate to the Bluehost plugin page and select the ‘Staging’ tab.

Click ‘Create staging site.’ Bluehost will then automatically generate a replica of your live environment.
Once complete, click ‘Not currently editing’ to seamlessly switch to your new staging site and begin your work.
You can now make, test, and preview all your changes in a safe, isolated environment.

To clearly distinguish your staging environment, a prominent red ‘Staging Environment’ notice will appear in your WordPress admin bar.

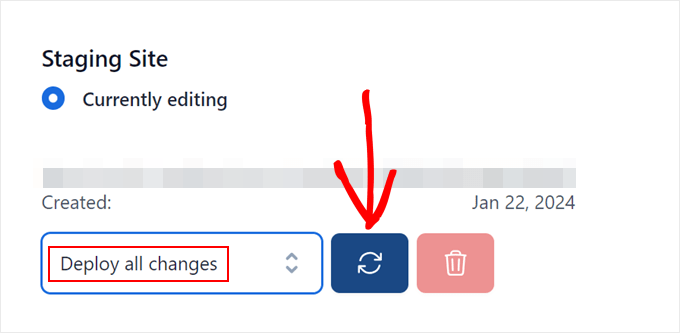
After diligently previewing and verifying your changes on the staging site, return to the Bluehost plugin page and the ‘Staging’ tab.
Select ‘Deploy All Changes’ and click the refresh button to effortlessly push your verified updates to your live website.
For a more in-depth guide on creating staging environments, including instructions for other hosting providers, consult our comprehensive tutorial on how to create a staging site for WordPress.
WordPress's intuitive block editor offers a fantastic real-time content creation experience, often displaying your work with your theme's styling. However, this in-editor preview might not always reflect the final appearance of your post or page within the full context of your website—including headers, footers, sidebars, and other theme-specific elements.
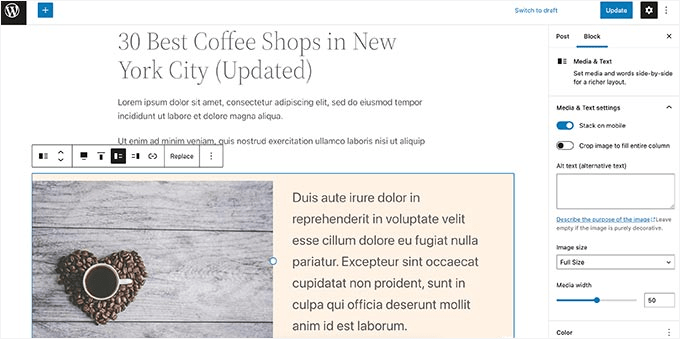
Thankfully, the block editor provides a robust solution for a true, site-wide preview of your content before it's published.
To access this crucial feature, simply click the ‘Preview’ button located in the top-right corner of the editor.

While you can choose between Desktop, Tablet, and Mobile preview options directly within the editor, these only offer an approximate view. To see the actual look and feel on your website, select your desired device, then click the ‘Preview in new tab’ option.
WordPress will then generate a full, accurate preview of your post or page, rendered just as it would appear to your visitors once live.
Need to share an unpublished post for feedback? Learn how to allow public post previews in WordPress with exclusive, shareable links.
Changing your WordPress theme involves a significant visual overhaul, and rushing this process can lead to a jarring experience for your visitors. Typically, activating a new WordPress theme instantly makes it live on your site, potentially exposing an uncustomized or unoptimized design to your audience.
While a staging site (as discussed earlier) is the most robust way to test a theme change, WordPress offers a clever built-in feature to preview a new theme with your existing content before committing to the switch.
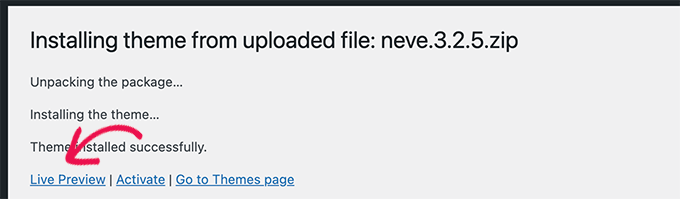
First, install the WordPress theme you wish to preview. For detailed instructions, refer to our guide on how to install a WordPress theme.
After the theme is installed, a ‘Live Preview’ link will appear. Click it.
Alternatively, you can visit Appearance » Themes, hover your mouse over any installed theme, and click the ‘Live Preview’ button that appears.

WordPress will then launch the Theme Customizer. Here, you will see a live preview of the selected theme rendered with your actual website content.
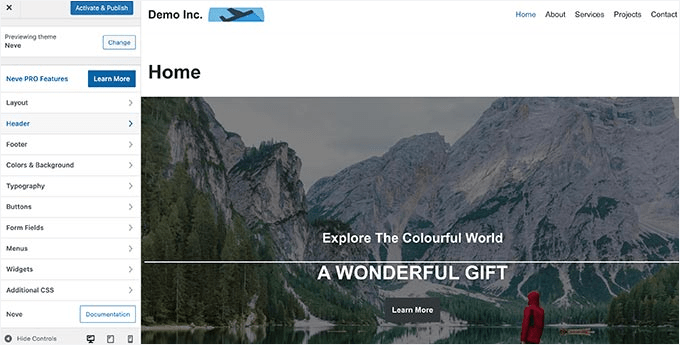
The Theme Customizer will populate the new theme with your existing content and navigation menu. You can experiment with various theme settings directly from the left panel, observing changes in real-time.
You can exit the Theme Customizer at any point without activating the theme or saving customizations. If you're satisfied with how the new theme looks and performs, click the ‘Activate & Publish’ button at the top to apply it to your live site.
Planning a theme change? Our tutorial on how to properly switch your WordPress theme walks you through the essential steps for a smooth transition.
Making tweaks to your WordPress theme is a common task, but visualizing how those changes will impact your live site can be tricky without the right tools. WordPress provides distinct methods for previewing your theme modifications, ensuring you're confident before pushing them live.
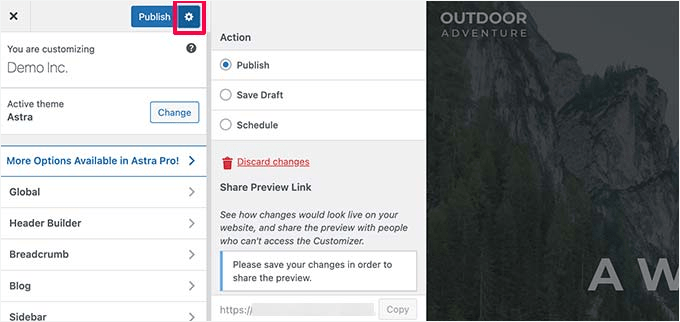
For most classic WordPress themes, the primary tool for live customization previews is the Theme Customizer. Access it by navigating to Appearance » Customize.
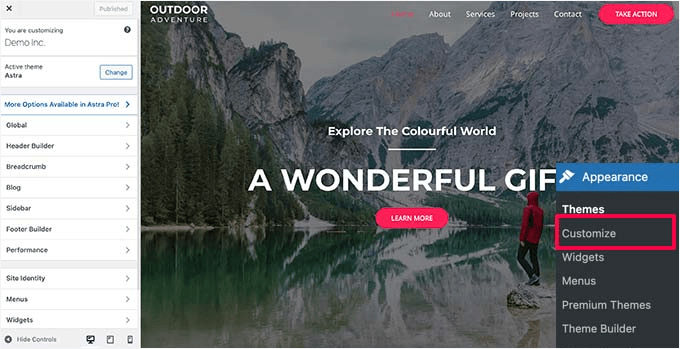
Within the customizer, you can explore various theme options, adjust menus, customize widgets, add custom CSS, and more, all with an immediate visual representation of your site. This allows you to experiment freely without affecting your live website.
Once you're satisfied with your modifications, you have several publishing options. Click the ‘Publish’ button to apply changes immediately. Alternatively, click the gear icon to save your changes as a draft, schedule them for a future date, or generate a shareable preview link for client review.
If you're working with modern WordPress block themes utilizing Full Site Editing (FSE), the Theme Customizer functionality might be limited or unavailable. In this case, you'll use the Appearance » Editor menu.

The Full Site Editor empowers you to modify your WordPress theme using a block-based interface, providing a live preview as you edit individual template files. For a comprehensive understanding, explore our complete guide to WordPress full site editing.
Important Distinction: Unlike the Theme Customizer, the Full Site Editor generally doesn't offer a 'save as draft' option for theme-wide changes. Your modifications will either go live upon saving or be lost if you exit without committing.
Dreaming of a completely bespoke WordPress theme that perfectly embodies your brand? Creating a custom theme from scratch often involves complex coding, but with a powerful tool like SeedProd, you can design and preview your custom WordPress theme using an intuitive drag-and-drop interface.
SeedProd stands out as the premier WordPress theme builder, allowing you to craft unique themes with a real-time visual representation of your design as it takes shape.
To get started, ensure the SeedProd plugin is installed and activated. If you need help, refer to our guide on how to install a WordPress plugin.
Upon activation, go to SeedProd » Settings and enter your license key.
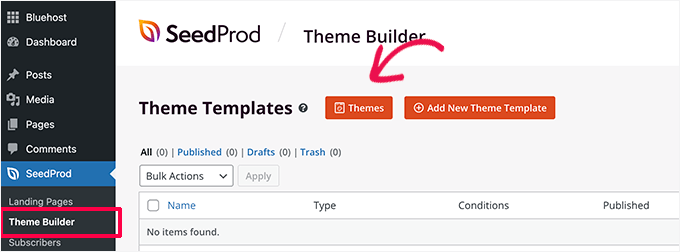
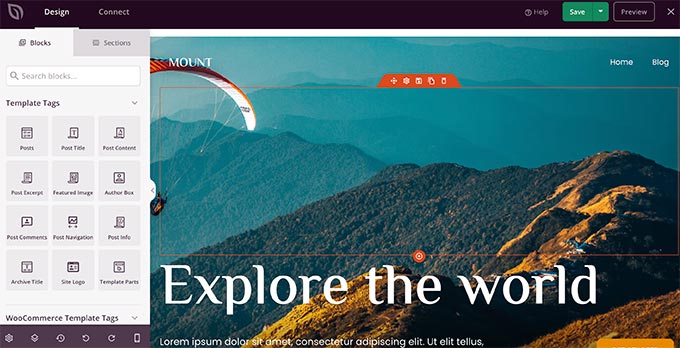
Next, navigate to the SeedProd » Theme Builder page. Click the ‘Themes’ button to begin.
A popup will appear, prompting you to select a pre-built theme as your starting point. SeedProd offers a wide array of beautiful themes and templates that are fully customizable.
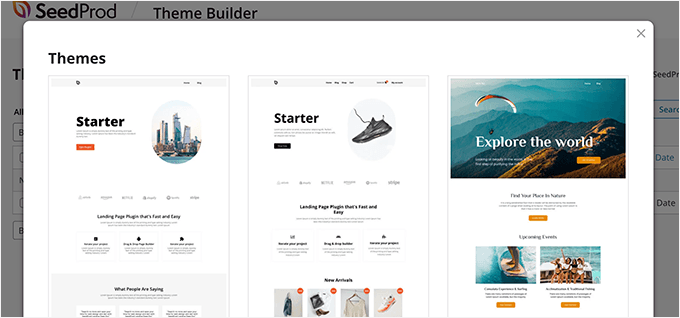
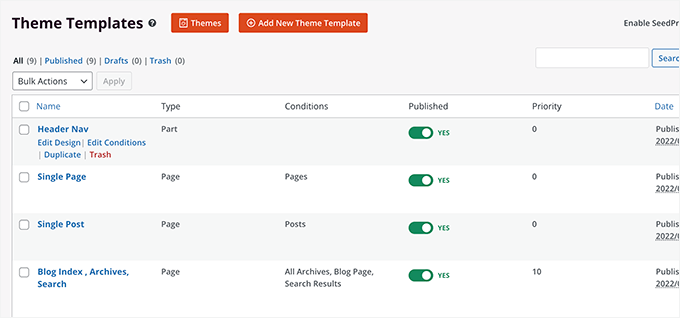
Select a theme, and SeedProd will automatically generate all the necessary theme template files for you. You can then click on any of these files to edit them within the intuitive theme builder.
SeedProd's drag-and-drop builder allows you to construct stunning layouts using blocks and sections. On the left, you'll find your design elements, while on the right, you'll see a dynamic, editable live preview of your theme template.
For e-commerce businesses, SeedProd offers full support for WooCommerce. This means you can design and preview your entire online store, including highly customized product pages, checkout flows, and more.

Wondering how your custom theme will look on mobile devices? Simply click the mobile icon in the bottom bar, and SeedProd will instantly display a responsive preview of your theme.
Once your theme design is complete, click the ‘Save’ button at the top-right and exit the builder. You can then continue to edit other templates as needed.
When you're ready to deploy your masterpiece, simply activate the ‘Enable SeedProd Theme’ toggle on the theme builder page.
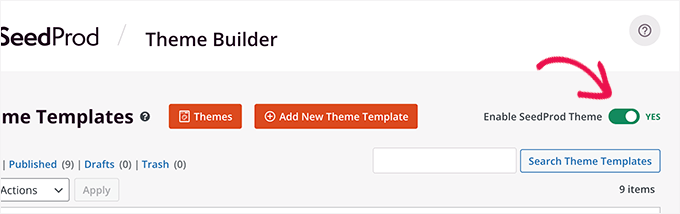
Your custom theme will now replace your existing WordPress theme and go live. To learn more about building themes with SeedProd, see our tutorial on how to create a custom WordPress theme without a single line of code.
Landing pages are the workhorses of digital marketing—highly specialized pages meticulously crafted to drive specific actions, whether it's lead generation, sales, or sign-ups. Their effectiveness hinges entirely on their design and flow.
While some WordPress themes offer basic landing page templates customizable with the block editor, achieving maximum conversion rates often requires more sophisticated design capabilities. This is where SeedProd shines. Recognized as the best WordPress landing page builder, SeedProd enables you to effortlessly create stunning, high-converting landing pages that look flawless across all screen sizes.
SeedProd comes packed with dozens of expertly designed landing page templates, providing a rapid launchpad for your campaigns.
Start by installing and activating the SeedProd plugin. Upon activation, visit the SeedProd » Settings page and enter your license key.
Next, from your WordPress admin sidebar, navigate to the SeedProd » Landing Pages screen. To initiate your design, click the ‘Add New Landing Page’ button.

You'll then choose a template. SeedProd offers various highly optimized options as a starting point, or you can opt for a blank canvas to build from scratch.

A popup will prompt you to name your landing page and define its URL slug. After filling in these details, click ‘Save and Start Editing the Page’ to proceed.

This action launches the intuitive SeedProd page builder interface. This powerful, drag-and-drop design tool provides a real-time, live preview as you construct your page.

Once your landing page design is perfected, click the ‘Save’ button, then select ‘Publish’ to make it live on your website.
For more detailed guidance, explore our tutorial on how to create landing pages in WordPress.
Want to elevate your website management to an elite level? Introduce Visual Regression Testing (VRT) into your workflow. VRT automatically compares screenshots of your website before and after making changes. This powerful technique is unparalleled in catching subtle design issues that human eyes often miss.
These elusive flaws can include:
For instance, even a routine plugin update could inadvertently disrupt the styling of a contact form or subtly misalign elements. VRT tools present these differences side-by-side, allowing you to instantly identify and rectify them before they ever impact your visitors' experience.

The simplest way to integrate VRT into your WordPress workflow is through the VRTs plugin. This plugin empowers you to run visual comparison tests on specific pages or templates directly from your WordPress dashboard, no coding expertise required.
You can even deploy it on your staging site for a completely safe testing environment before pushing updates live. For a comprehensive guide, read our detailed article on how to do visual regression testing in WordPress.
Mastering the art of previewing your WordPress website before it goes live is more than just a technical skill; it's a commitment to excellence and a bedrock of professional web management. By integrating these strategic preview methods—from 'Coming Soon' pages and client previews to robust staging environments and granular content checks—you transform potential anxieties into absolute confidence.
You eliminate embarrassing errors, safeguard your brand's reputation, and ensure every visitor encounters a polished, fully functional, and visually appealing experience. Don't leave your website's success to chance. Embrace these essential practices, and launch every update, theme, and page with the certainty that it's perfect.
Hungry for more expert insights and strategies to optimize your WordPress journey? Explore our expert tips for creating a WordPress disaster recovery plan and delve into our ultimate guide to WordPress maintenance.
If this article empowered you to preview like a pro, then subscribe to our YouTube Channel for more essential WordPress video tutorials. You can also connect with us on Twitter and join our vibrant community on Facebook.
